Aluminum sheet is one of the most widely used metals in home improvement projects. It is an inexpensive, lightweight yet highly resilient metal. This makes it suitable for various construction jobs in the home. It can be used for duct work, roof flashing, soffits, siding or gutters. Various tools can be used to cut lightweight metal sheets. Some of the commonly used tools include a utility knife, jump shears, router cutter or aviation snips. Aviation snips are a good choice. These allow you to achieve both straight and curved cuts. They also make it easier to cut circular holes in light metal
Aluminum Sheets. Below is a guide on how to cut Aluminum Sheet with aviation snips.
Materials Needed
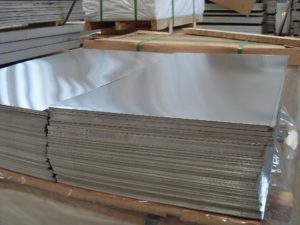
Aluminum sheet
Aviation snips
Carpenter’s level
Heavy duty gloves
Safety goggles
Felt tip marker
Awl
Step 1 – Put on Protective Wear
Whenever you have to cut Aluminum Sheet metal, it is important that you protect your hands and eyes. Heavy leather work gloves will protect your hands from cuts and scratches. Protective eyewear keeps the eyes safe from tiny splinters of metal that may fly in the air as you cut.
Step 2 – Prepare the Aluminum Sheet
Place the Aluminum Sheet on a work surface. Mark the cut line with a marker. This will enable you to proceed smoothly and efficiently.
Step 3 – Straight Cuts
Use yellow-handled snips for straight cuts. Place the carpenter’s level or straight piece of lumber along the marked line. Hold the tool in the hand you use most often. Use the other hand to hold down the Aluminum Sheet metal. Open the snip jaws wide apart. Draw the blades together slowly until they cut through the metal. Aim to make long, smooth cuts. Do not snap the blades together completely at the end of the cut. It’ll nick the metal edges. Once you’ve cut a metal strip, roll it aside so that it doesn’t bind on the tool or get in the way of your hand.
Step 4 – Curves and Circles
Mark a curve or circular shape on the aluminium sheet. For circles, use an awl to punch a starter hole in the metal. Green coded snips are best for clockwise cuts, and red coded snips for anticlockwise cuts. These will ensure neat cuts with straight edges. Open the snips and insert the lower blade tip into the hole. Bring the blades together to close in on the marked line. Work in whatever direction you feel most comfortable. As you begin to cut, the shears will not open to their widest extent because of the short cutting line. However as you proceed, the already cut portion will give you more allowance to maneuver. Due to the curved nature of circles, you’ll not be able to make such long cuts as the straight cuts. Work steadily until you complete a curved or circular cut.
Safety Tips
Engage the latch on the side of the snips when not in use. This prevents accidental cuts.
Green snips are suitable for various curves if you’re right-handed. Red snips are more comfortable to work with if you’re left-handed.
For jobs that require you to cut metal, it is important that you work in a well-lit area. This assures accuracy and helps to prevent accidental cuts to your hands.